
Lofts on Fillmore: A 3-Story, 20-Unit Condo HOA Roof Restoration in Downtown Phoenix
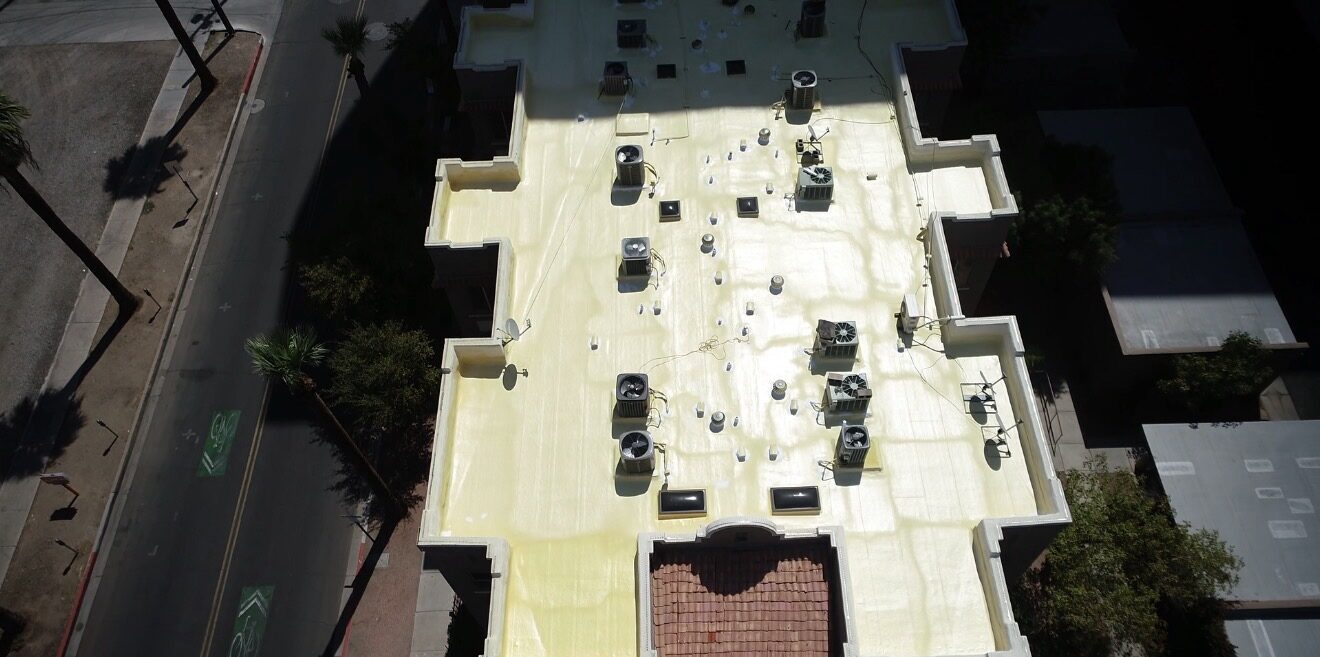
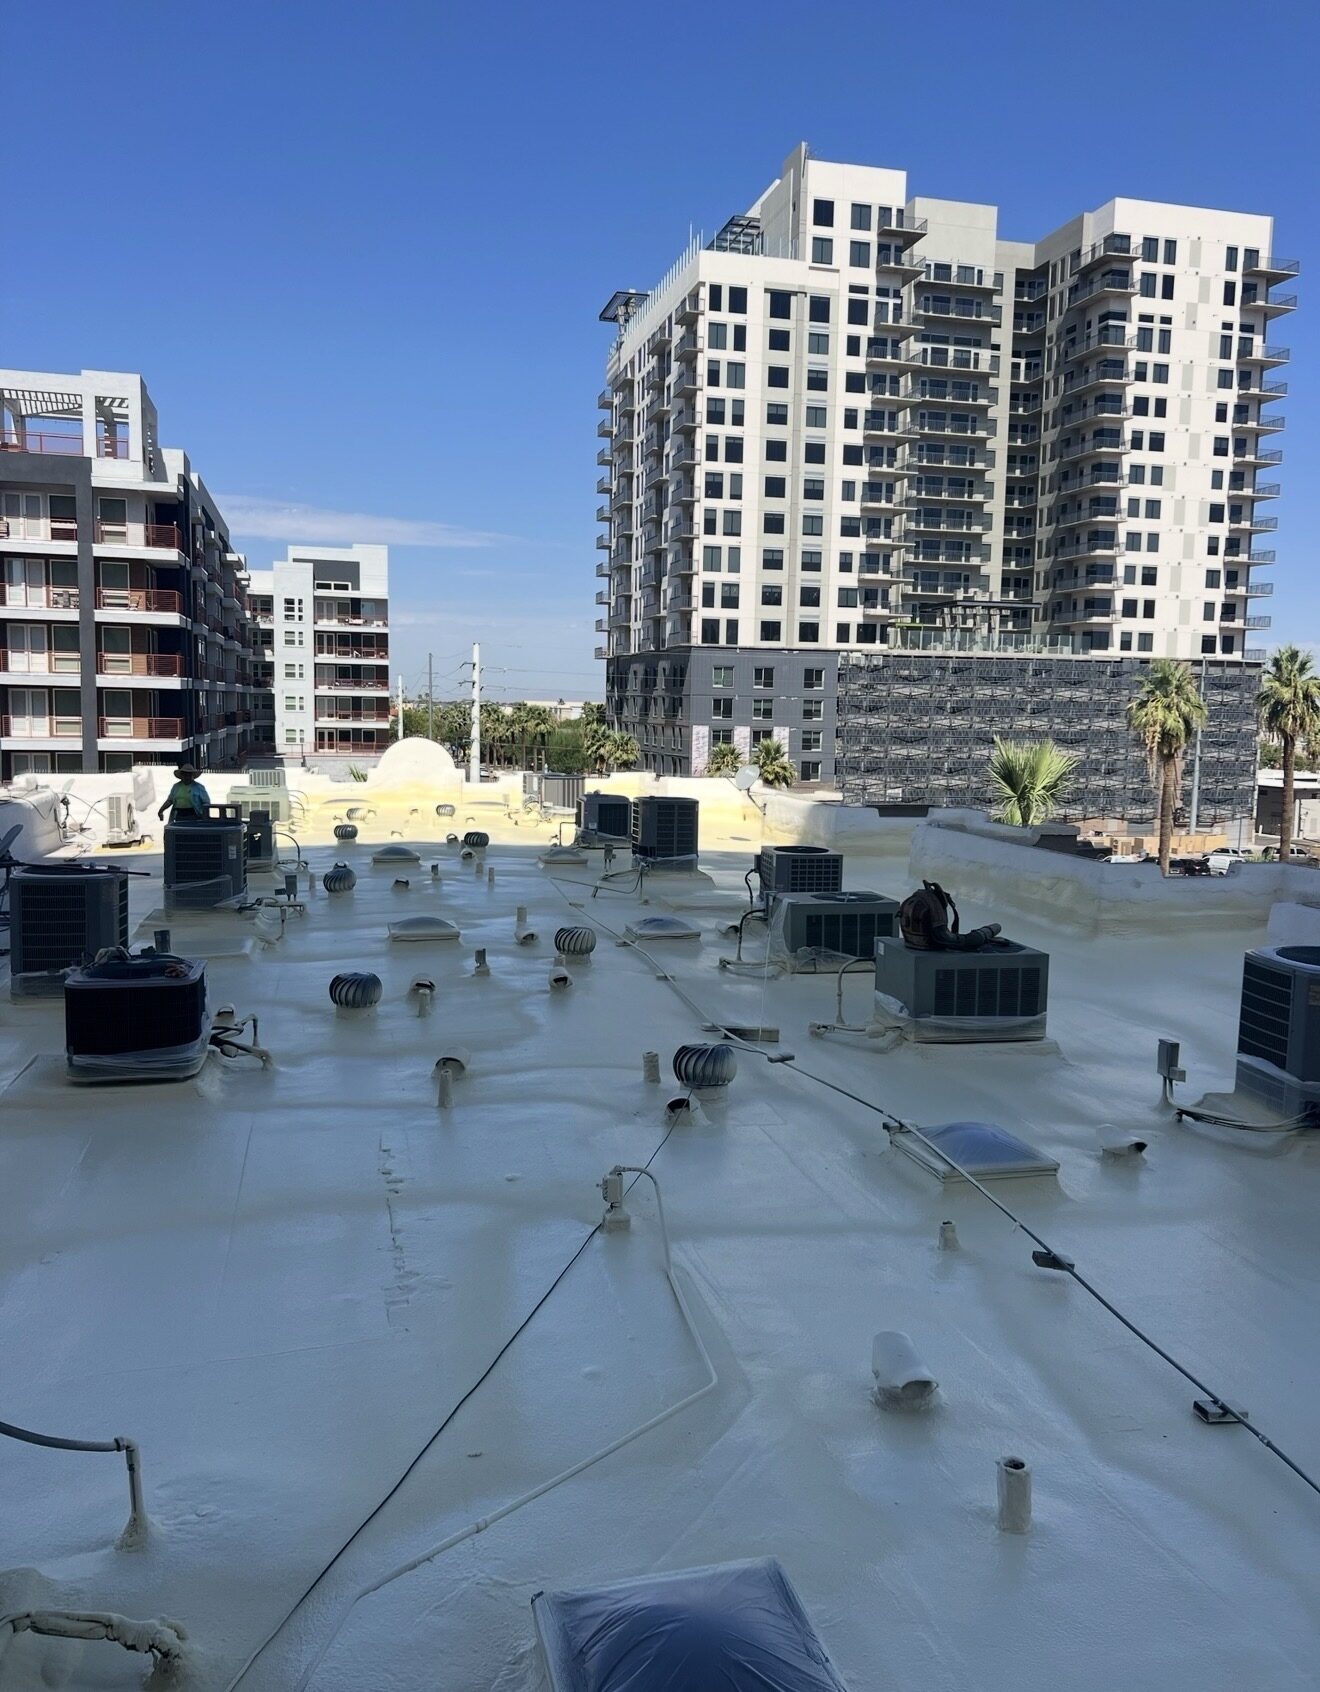
An aging coated BUR roof, AC units sitting on rotting wood blocks, and a board that needed a clear written proposal and zero owner disruption. We restored the entire 7,000 sq ft roof system with ArmorShield 2500 foam over the existing BUR, finished it with two coats of ARMORCOAT AC100 white elastomeric, built proper foam equipment platforms under every AC unit, and coated the detached garage roofs to match — all in four working days.
The PropertyA downtown Phoenix condo HOA with 20 unit owners and a real fiduciary duty
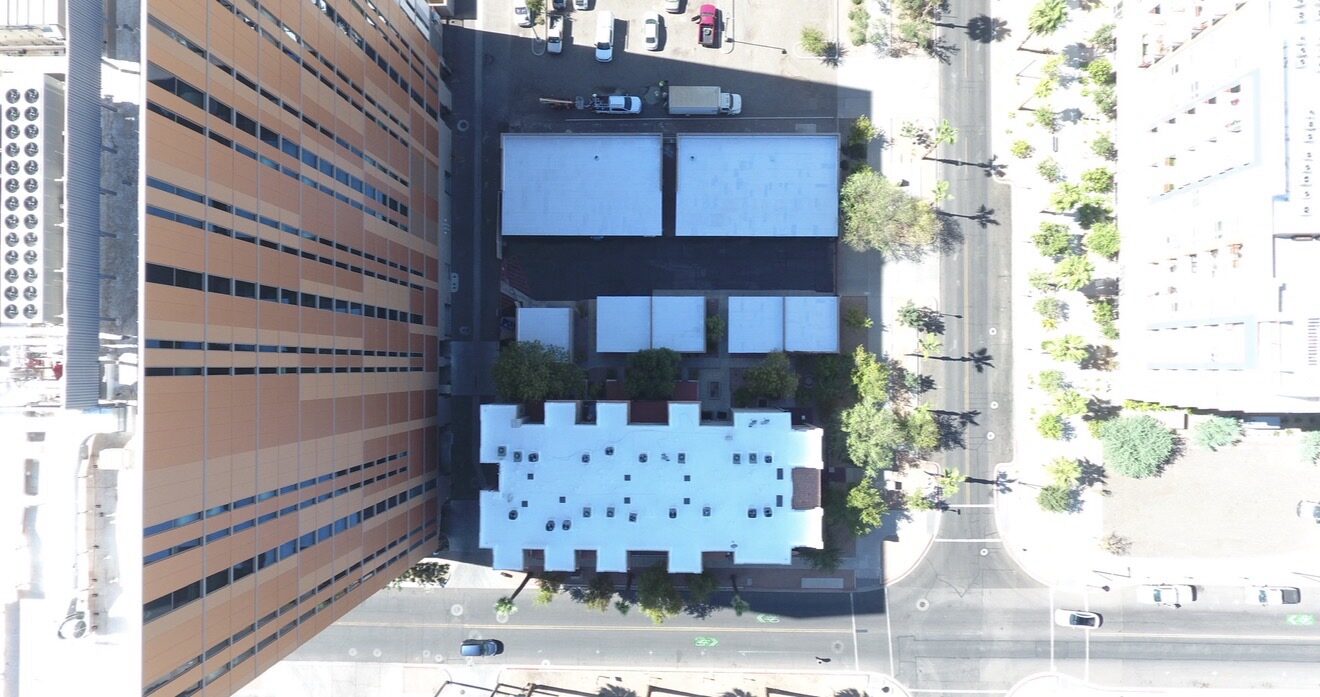
Lofts on Fillmore is a 3-story, 20-unit condominium HOA at 387 N. 2nd Avenue in downtown Phoenix — one block off Fillmore, surrounded by high-rise residential towers, the Phoenix light rail corridor, and a mix of historic and new construction. The building has a flat roof of roughly 7,000 square feet plus a row of detached garages on the property serving the residents.
An HOA board this size doesn't have a full-time facilities team. The board members are unit owners themselves, balancing a real fiduciary duty to every other owner in the building. When the roof started leaking and the board began collecting bids, they needed three things from a contractor: a clear written proposal they could put in front of the board for vote, a realistic schedule that wouldn't blindside the 20 unit owners living under the work, and a long-term warranty they could point to in the meeting minutes. Here's what we delivered.
What We FoundAn older coated BUR roof in decent shape — with two problems
The existing roof was an older built-up roof (BUR) that had been coated with elastomeric at some point in the past. The membrane itself was actually in decent shape for its age, which made this a strong restoration candidate rather than a tear-off. But two problems were causing the active leaks and demanding immediate action.
Problem one: the original elastomeric coating had worn through in places, with cracking and surface erosion exposing the BUR underneath. Once water gets past a worn topcoat on a BUR, it migrates between layers and shows up in unit ceilings nowhere near the actual failure point.
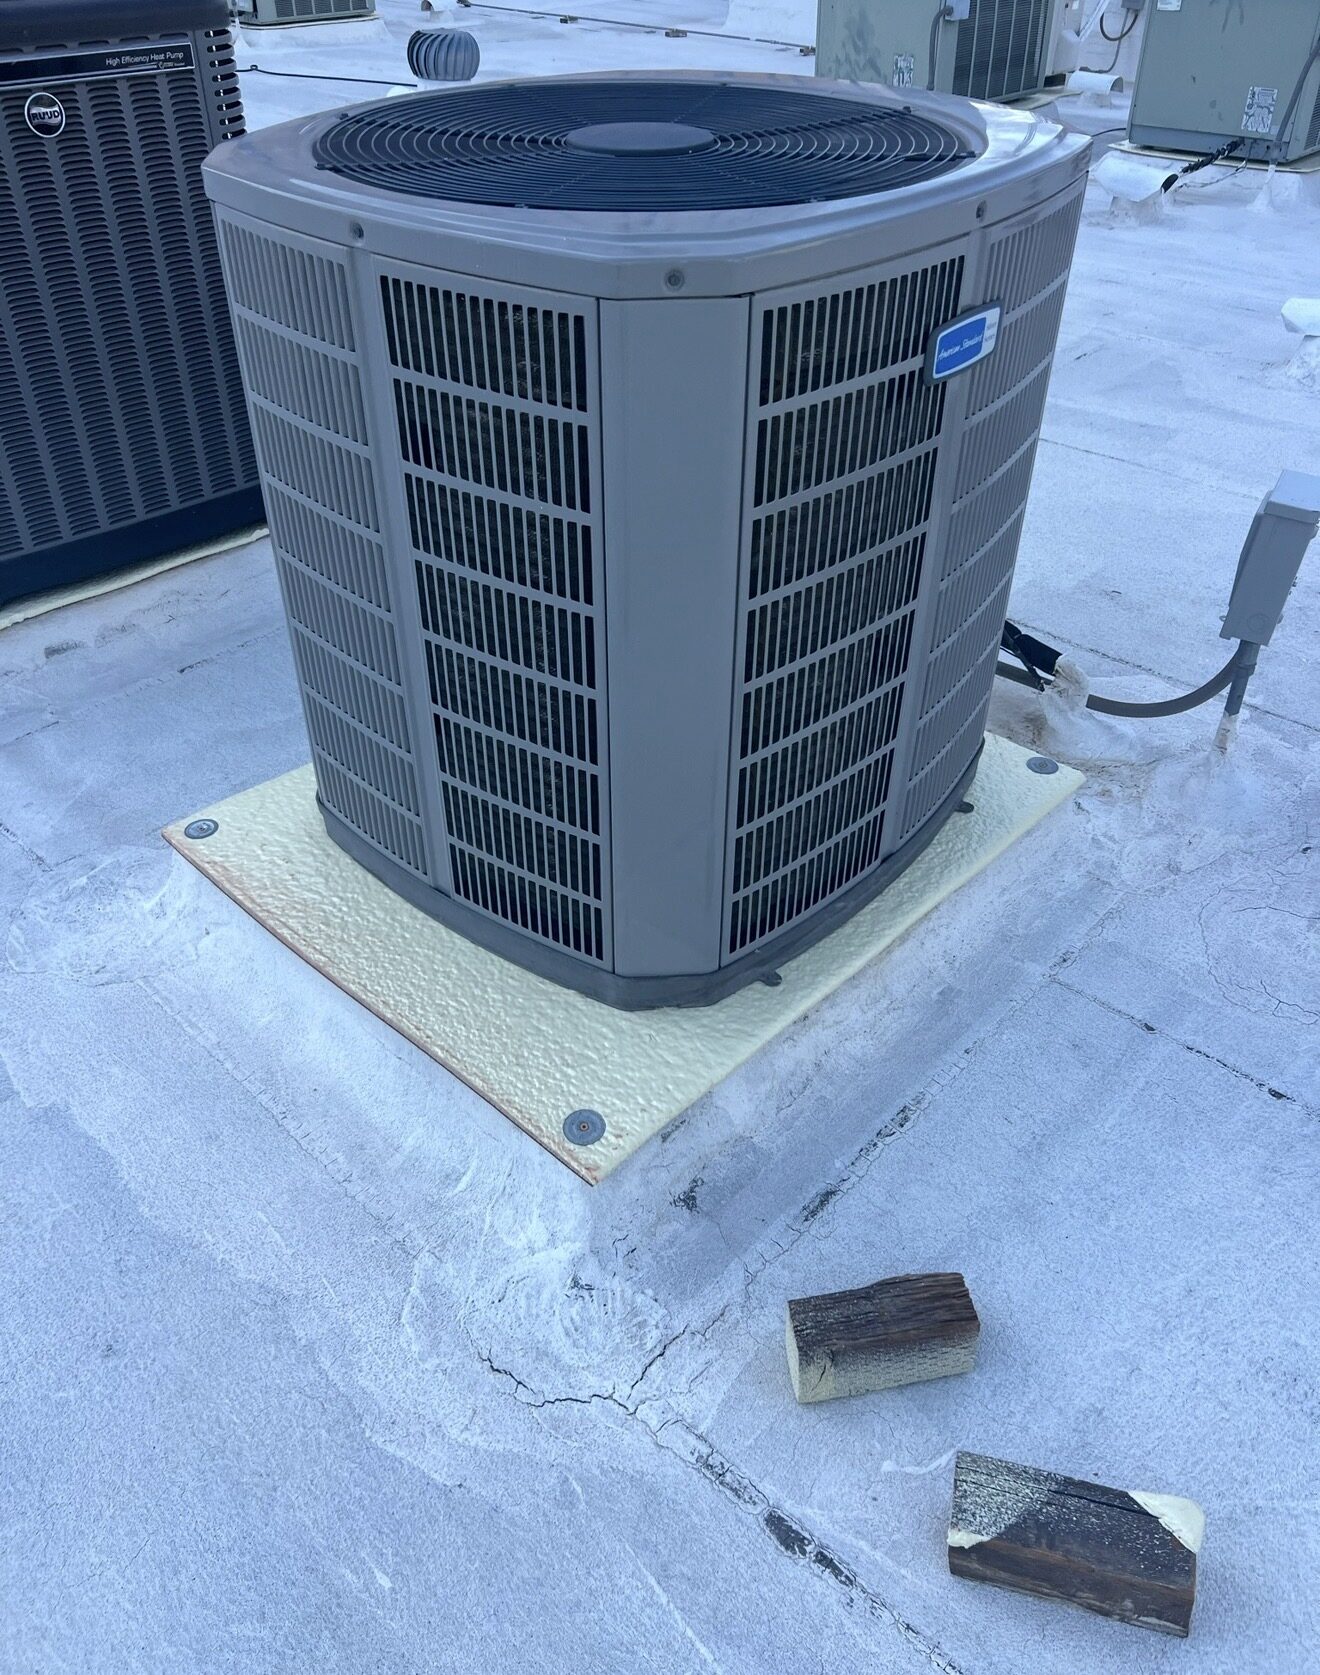
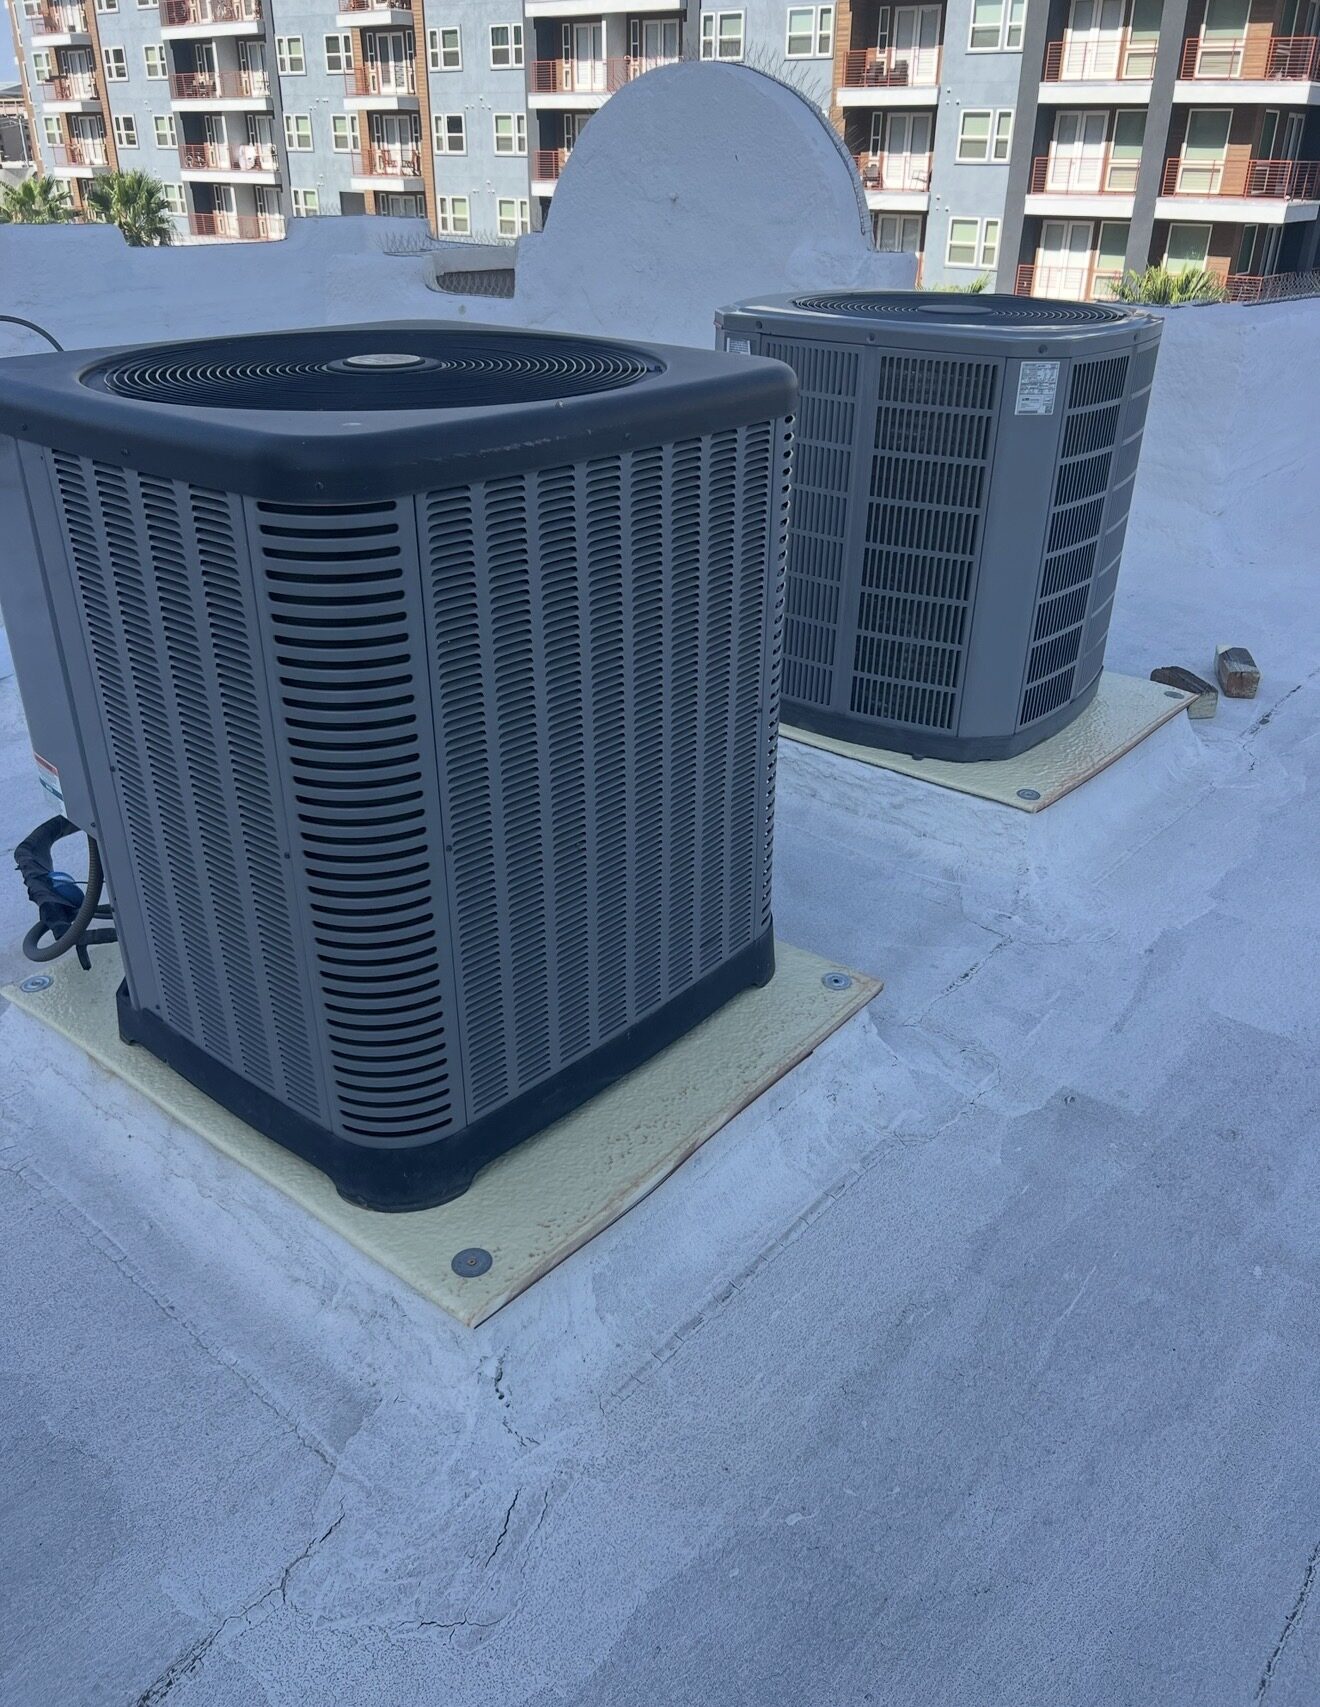
Problem two — and this one was the kicker: every single AC condenser on the roof was sitting directly on rotting wood blocks, with the wood resting on the membrane itself. Two decades of thermal cycling, vibration, and Phoenix UV had turned those blocks into leak factories. Each block created a micro-flex point in the membrane underneath, with cracking visible right where the wood touched the roof.
Working With the BoardThe HOA paperwork that matters
HOA projects live or die on documentation. Boards have to defend every dollar to other owners, and they have to do it in writing. Our process for Lofts on Fillmore is the same process we follow on every HOA we work with:
HOA-specific scope on this project
- Written proposal: Full scope, materials, timeline, warranty, and pricing in a single document the board could attach to meeting minutes and present for vote
- Board approval before mobilization: We do not start work on an HOA until the proposal is formally approved in a recorded vote
- Owner notification & schedule coordination: Together with the board, we communicated work dates, noise expectations, parking impacts, and crew access points to every unit owner in advance
- Certificate of Insurance naming the HOA: COI issued with the association listed as additional insured, delivered before any equipment hit the site
- Daily progress visibility: The board point-of-contact got daily updates with photos
- Final walk & warranty handoff: Together we walked the finished roof, signed off, and issued the 10-year No Leak Warranty paperwork on completion day
The ScopeStep by step — what we actually did
This was a foam-over-BUR restoration with a fully sealed AC equipment retrofit and a separate coating system for the detached garage roofs. Here's the exact sequence:
Project sequence — 4 days, 4 crew
- Step 1 — Clean. Pressure-washed the entire existing BUR/elastomeric surface to remove chalk, dirt, and loose material. Coating systems only bond to clean substrate, so this step is non-negotiable.
- Step 2 — Install pre-foamed AC platforms. Built proper foam-and-aluminum equipment platforms for every condenser on the roof. The platforms isolate the AC units from the roof membrane, eliminate the rotting-wood-block problem permanently, and distribute load across a wider footprint. This single detail is why the old roof leaked under every AC unit — and why this one won't.
- Step 3 — Owner-disruption mitigation. Took proper precautions to minimize inconvenience to the 20 unit owners living below the work — coordinated noise-sensitive hours, kept HVAC operational throughout, and managed equipment staging on the street rather than blocking resident parking.
- Step 4 — Applied 2 passes of ArmorShield 2500 premium roofing foam. Two full passes of spray polyurethane foam over the prepared BUR substrate. This adds insulation value, eliminates seams, levels low spots, and creates a monolithic substrate for the topcoat.
- Step 5 — Applied 2 coats of ARMORCOAT AC100 white elastomeric. Two full coats of ARMORCOAT AC100 reflective white elastomeric over the new foam. The first coat seals and primes; the second coat builds the protective film thickness that earns the 10-year warranty rating and gives the roof its bright, reflective finish.
- Step 6 — Detached garage roofs. The detached garage roof structures on the property got a separate treatment: clean, patch existing surface defects, and a full coating with PDI premium asphalt aluminum coating — a tested, code-compliant aluminum-pigmented asphalt coating ideal for asphalt-based garage roof systems.
- Step 7 — Final cleanup. All roof-related debris cleaned and properly disposed of off-site. Final walk with the board contact before warranty issue.
The Work in ProgressFoam applied, platforms installed, downtown Phoenix as the backdrop
Project InvestmentWhat an HOA project like this actually costs — per square foot
HOA boards are responsible to their owners for every dollar, and most boards we work with are putting our proposal next to two or three others. So instead of hiding numbers, we'll show you the math the way property managers and reserve study analysts already think about it: per square foot of roof restored.
≈ $6.15 per sq ft — foam-over-BUR + 2-coat elastomeric + AC platforms + garage coatings
| Main building roof area | 7,000 sq ft |
| System | Foam-over-BUR + ARMORCOAT AC100 |
| Includes | Pre-foamed AC platforms + detached garage coatings |
| Total HOA investment | ≈ $6.15 / sq ft |
For context, our published Phoenix-metro commercial roofing pricing runs $3.50-$8.00/sq ft for SPF work and $2.00-$7.00/sq ft for silicone coatings. This project fell in the upper-middle of that range because of the AC platform retrofit and the separate garage roof system — both of which are typical add-ons on real HOA jobs. See our full Phoenix commercial roofing pricing →
The Warranty10-Year No Leak — issued by Vanguard, not a third party
This restoration is covered by a 10-year No Leak Warranty issued directly by Vanguard Roofing AZ. For an HOA board, that's a clean, recordable instrument they can attach to the meeting minutes and reference in the reserve study: a 10-year window during which any water intrusion through the warranted roof system means we come fix it. No third-party claims process. No manufacturer hand-offs. Our work, our warranty, period.
For boards thinking about reserve study alignment: a 10-year warranty resets the roof's useful-life clock on the reserve component schedule. That changes the funding requirement for that line item for the next decade — usually a meaningful win for the HOA's reserve adequacy ratio.
For HOA BoardsWhy restoration was the right answer here — and might be for your property
A full tear-off and replacement on a 3-story occupied condo HOA is a different universe of project: crane access in a tight downtown lot, weeks of crew presence over occupied units, dumpster permits, debris management, dust and odor complaints, and a price tag that usually doubles or triples the restoration cost. For an HOA roof with a sound substrate — even a 20-year-old BUR — restoration is almost always the right financial answer, and it's usually the right answer for owner experience too.
The key word is "substrate." If the BUR or foam under the surface is still structurally sound and the field is dry under the surface coating, restoration with new foam + elastomeric (or silicone + elastomeric, depending on the building) is the textbook play. If the substrate is failing or saturated, replacement is the only honest answer. The only way to know which one you have is a proper inspection — moisture scan, core samples, drainage check. We do this free for any HOA in the Phoenix metro.